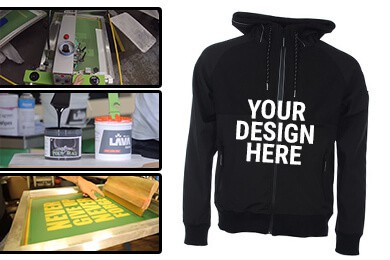

You’d love to screen print a well-loved hoodie of yours. The only problem? It’s got a zipper right down the middle. How would you do this printing job without the zipper interrupting the print?
To screen print zip-up hoodies, you must do the following:
- Choose a suitable design for the hoodie
- Retool the design so it fits
- Ensure you have a covered zipper
- Select your ink type
- Preshrink the hoodie
- Set the off-contact distance
- Flash the design
- Cure the hoodie
Curious what curing or off-contact distance means? Want to know which designs work for a zip-up hoodie versus one without a zipper? You’ve come to the right place, as we’ll discuss all these points and more in this article. Keep reading!
Screen Printing a Zip-up Hoodie: 8 Steps to Follow
Step 1: Selecting Your Design
Okay, first thing’s first, and that’s picking which design you’d like to screen print onto your hoodie. Given that yours has a zipper, you’re more limited in your design choices compared to working with a hoodie without a zipper.
If you want a vintage-looking or distressed design, these types of graphics look especially good with a zippered hoodie. Since they’re not perfect on purpose, any flaws that naturally crop up in your screen printing will look like they’re there deliberately. The more perfect the design, the more obvious these defects would look.
You also want to make sure you avoid these designs with your zippered hoodie screen printing.
Designs with a Solid, Heavy Style
You might think that because a hoodie is a much thicker, heavier garment than a t-shirt that you can get away with an equally heavy design. That may be true of regular sweatshirts, but with a zip-up hoodie, you don’t want those heavier, solid designs.
When trying to print these designs over the hoodie, the ink will get caught in the zipper and grooves. This makes the print look bad. It is possible to minimize ink accumulation by using simulations or halftones. Both can increase the dot distance so there’s less ink. Overall, it’s best if you don’t choose a more solid design, though. If you absolutely must, then move the design off-center so it doesn’t cover the zipper.
Symmetrical Designs
Remember how we said to expect imperfections when printing with a zippered hoodie? That’s the exact reason symmetrical designs won’t work. Since the hoodie can move a little during printing, the design won’t be perfectly straight across.
Designs with Text
For that same reason, we do not recommend trying to print text on a zippered hoodie, either. First, it’ll turn out slightly crooked or otherwise a little off. Also, the zippered style means breaking a word or phrase in half when you unzip the hoodie. That’s always a bit awkward.
Step 2: Preparing the Artwork for a Hoodie
A hoodie is not a t-shirt. Yes, that’s common sense, but it’s important to be aware of here. Since we’re talking about two different garments, the art you’d use on a t-shirt probably wouldn’t apply on a hoodie, at least not in the exact same size and positioning.
From pockets to drawstrings and the hood itself, there are elements of a hoodie you must accommodate for. This often means shrinking or moving the design down a little so it’ll fit in the best and most flattering way on the hoodie.
This is especially important if printing a design on the back of the hoodie. Sure, there’s no zipper back here, but there is the hood. If you want the back design completely visible even with the hood down, you have to take precise measurements of the hood size and width. Then, you’d move the design further on the back, closer to midback, so that even when the hood is down, it doesn’t interfere with the design in any way.
This video shows some designs you might consider yourself. At the very least, they can serve as a form of inspiration:
Step 3: Printing on a Covered Zipper
The zipper of a hoodie comes either covered or uncovered. An uncovered zipper, as the name may imply, is completely exposed. With a covered zipper, there’s fabric on either side of the zipper that obscures the zipper chain, or the little metal grooves in which the zipper moves up and down.
If you intend to print over the zipper of your hoodie, then your zipper should be covered. While sure, you could print over an uncovered zipper if you really wanted to, the final product will disappoint you. The print won’t show up well over the zipper, not to mention the ink can get stuck in the chain. Now, not only do you have an unappealing design on your zip-up hoodie, but the zipper won’t work anymore, either.
Here’s a video showing another zippered hoodie screen printing don’t:
That won’t happen when printing over a covered zipper. Should you only have a hoodie with an uncovered zipper, that’s okay. Just readjust your design so you’re no longer printing anywhere near the zipper; problem solved!
Step 4: Picking the Ink
You’re confident in your design and its placement on your zip-up hoodie. Now comes the time to choose your ink. This is arguably one of the most important parts of the entire process, if not the most important. After all, by working with the wrong kind of ink, you might end up with a printed hoodie you’re not really happy with. Let’s talk more about the types of printing ink that work best on hoodies.
Plastisol Ink
Many screen-printing companies use plastisol ink. That’s due to the opaqueness and shininess of this ink, with the latter especially apparent when you add more layers to the design.
Plastisol, as you may have guessed, does contain plastic. You can tell it’s there due to the quality of the ink, as it feels almost plastic-y. The ink will not permeate into the hoodie fabric even a little bit, but rather, rest atop it. Your design should look pretty clear then with plastisol ink, even if it doesn’t feel particularly great.
Discharge Ink
Your next option is discharge ink. This does permeate into the shirt or hoodie, so it’s already different from plastisol ink in that regard. It has some water in it as well as a bleaching agent is known as a discharge agent. This cuts down on the fabric dye.
Hoodies printed with discharge ink feel more pleasant to the touch than those that use plastisol. That’s because discharge ink lacks that plastic-y feeling that may be unappealing to some. It’s only recommended you use discharge ink on darker hoodies and other garments, such as those that are dark blue or black. The colors of the screen printing will then look incredibly vivid.
Water-Based Ink
Then there’s water-based ink. While discharge ink is somewhat water-based itself, water-based ink doesn’t have any discharge agent in it. Instead, you have an ink that leaves you with a very soft printed hoodie. Both it and discharge ink permeate into your hoodie fabrics in equal amounts, and they can get pretty deep.
For a vintage-styled zippered hoodie, water-based ink is the way to go. It delivers that vintage feel with aplomb. The design blends in so well to the hoodie that you can’t even tell anything was ever printed by touch alone.
Since water-based ink is a bit more fluid than the other two ink types, it does have its limitations. For instance, very detailed designs are better left for discharge ink or even plastisol ink. Also, once your design has more than five colors, you’ll have to choose another ink type than water-based.
This short but sweet video shows you what plastisol and water-based ink look and behave like:
Step 5: Preshrinking the Zip-up Hoodie
Hoodies, zippered or not, come in a wealth of different materials. Some may have polyester, others cotton, and more still fleece. Depending on the type of material you’re working with, you must be aware of the potential for the hoodie to shrink.
For instance, fleece will almost definitely shrink. Synthetic hoodies, another popular type of fabric, can shrink as well. With most of these hoodie materials, the shrinkage occurs if the hoodie is heated to a high temperature. This can happen when using a conveyor dryer or a flash cure unit. We’ll talk more about curing later in this article.
What we will say for now is that, at some point, you can expect the temperatures to get quite hot for your screen-printed zippered hoodie. Thus, the potential for shrinkage is definitely there. To compensate, some screen printers opt to pre-shrink the hoodie using a conveyor dryer.
A conveyor dryer is an appliance that dries hoodies, t-shirts, and other screen-printed garments. The dryer comes with different belt widths and overall sizes to accommodate a variety of screen printers. For instance, you can get a smaller unit if you do screen printing out of your home. Those who have a screen-printing business can order a bigger conveyor dryer that fits in their building.
You may wonder, what’s the harm of the hoodie shrinking after printing? Well, the printed design can end up similarly shrunken and distorted. By preshrinking the hoodie, it ensures the garment won’t shrink further if it’s treated in a flash cure unit or even if it goes through a second round in the conveyor dryer. This will maintain the look and integrity of the printed design.
Step 6: Adding More Off-Contact Distance
As we said before, a t-shirt and hoodie are not the same. The latter is much thicker, which means taking additional measures when printing. One of those measures is extending the off-contact distance of the design.
With off-contact printing, the printer relies on press pallets, a screen, and a squeegee. A bit of room can be left from the gap between the pallet and the screen, and this space is often vertical. Since the squeegee moves along the screen at high pressure during printing, pushing the ink onto your hoodie, the wrong off-contact distance can hinder your design.
For example, let’s say you went with an off-contact distance that was bigger than necessary. The force of the squeegee can actually cause the screen to become longer. This stretches the design, ruining your hoodie because the print didn’t turn out right.
What if you choose an off-contact distance that’s smaller than necessary? In that case, the hoodie and the screen are very near one another, leading to smearing and smudging during the printing process. Your hoodie might not even come off clean, as the print can get stuck to the screen of your printing machine.
Other issues that can occur without knowing the proper off-contact distance include color overlaps and mismatches, blotchiness, bubbliness, uneven ink application, and blurriness. None of these results are desirable.
How do you know what the right off-contact distance is then? It’s about 1/4th an inch. The off-contact distance can vary by design, but if you have a proper distance set, your screen should never be too close to the hoodie. It also shouldn’t press down hard on the hoodie like what can happen with too much off-contact distance.
Depending on the age of your printing machine, you can either adjust the off-contact distance manually or digitally. If it’s the former, try toggling with the wrenches or knobs included with your printing machine until you find an optimal off-contact distance. Doing so digitally is more ideal since you can get more precise movements, switching the off-contact distance as little as .001 inches at a time.
This video will show you how to achieve the optimal off-contact height for screen printing:
Step 7: Flashing the Design
Next, it’s a good idea to flash your zip-up hoodie, again due to the thickness of the garment. To explain flashing, we first have to define another printing term called an under the base. The under base refers to a colored ink base that goes on the hoodie first. Under bases are often white. While you don’t always see the under the base, it serves an important purpose. Without it, the colors printed on your hoodie wouldn’t turn up as clear and bright.
Okay, so what does that have to do with flashing? Once the under base is printed onto your hoodie, flashing will allow that ink to dry. Flashing, like several other processes involved in screen printing, does use heat. That’s just one more reason of many why preshrinking is such a good idea.
Flashing is named such because it’s a seconds-long process. The under base is now quickly dried so the rest of the design can be printed onto the hoodie.
If you want to see an example of flashing, check out this video here:
Step 8: Curing the Screen-Printed Hoodie
Your zip-up hoodie has your design printed on it and it looks pretty good. Before it’s totally done, you should wrap up by curing the garment. This is another job that uses heat, but some screen printers advocate for lowering the temperature during curing.
Why is that? If you’re using a synthetic material for your screen printing, as many zippered hoodies do, high curing temperatures increase the chances of dye migration. This is a dye leakage issue that can ruin the colors originally intended for your hoodie. Even if the dye doesn’t leak, the colors could still become altered should your hoodie get too hot.
While it’s true that higher-temperature curing doesn’t take as long, the risk of dye migration is probably one you don’t want to chance if you’re screen printing for the first time. It’s much better to wait a bit longer for curing. You’ve come this far, and it would be a shame to mess up the hoodie so late in the game.
Tips for Washing a Printed Zip-up Hoodie
You’re very happy with your screen-printed zip-up hoodie. Eventually, it will have to go through the washer and dryer. How can you clean the hoodie without fading or degrading the quality of the print?
Here are some tips and pointers.
- Don’t wash your hoodie often: Some people advocate going as many as six wears before washing the hoodie. You may do so a little more often or wait until it begins smelling and then wash it. Simply put, the less often you wash the hoodie, the longer the print will look as good as possible.
- Never wash the hoodie unzipped: This is doubly true if you printed around the zipper. You want to zip the hoodie all the way up. You may even attach a safety pin to the zipper so it won’t come down as it tumbles about in your washer.
- Don’t wash the hoodie right side in: One of the fastest ways to wear away the print is to wash your hoodie right side in. This goes for any screen-printed garment, including t-shirts. Always turn them inside out to protect the print.
- Use a garment bag: If you want to take even further precautions, washing your hoodie inside out in a garment bag will keep it extra safe. Now, even your washer can’t flip the hoodie right side in.
- Wash on delicate: Regular washing cycles can be a little tougher on clothes than when you clean them on the delicate cycle. Always wash your zip-up hoodie on delicate.
- Use cold water, not hot: You know what can happen to your print if it’s exposed to too much heat. To keep the graphics and colors looking crisp, only wash your hoodie with cold water.
- No bleach in the detergent: Bleach is very damaging on clothes, screen-printed ones included. Your detergent should be mild and never contain any bleaching agents.
- Don’t use fabric softener: Yes, fabric softener does produce touchably soft, clean clothes, but dryer sheets and fabric softener alike don’t play nicely with all fabrics and inks.
- When drying, use low heat: Again, to not expose your hoodie to too much extra heat, use a lower heat setting on your dryer. You can also line dry the hoodie if you prefer.
Conclusion
Screen printing a zippered hoodie is more challenging than printing on a regular hoodie or a t-shirt. You must choose your design and ink more consciously. Despite all the work, the finished product is very rewarding. With the steps and guidance in this article, you should have all the info you need to do your own screen printing today. Best of luck!